
Home Management
Configuring the homepage slider, sections, carousel, popup, and menu settings.
Home Management
The Home section controls what viewers see when they arrive at https://platform.hometownlive.tv. Use these settings to feature content in the hero slider, configure which homepage sections are visible, manage a secondary carousel, and set up an optional welcome popup. These settings have an immediate effect on the viewer experience and should be updated whenever your featured content changes.
Slider
Location: Sidebar → Home → Slider (/admin/slider)
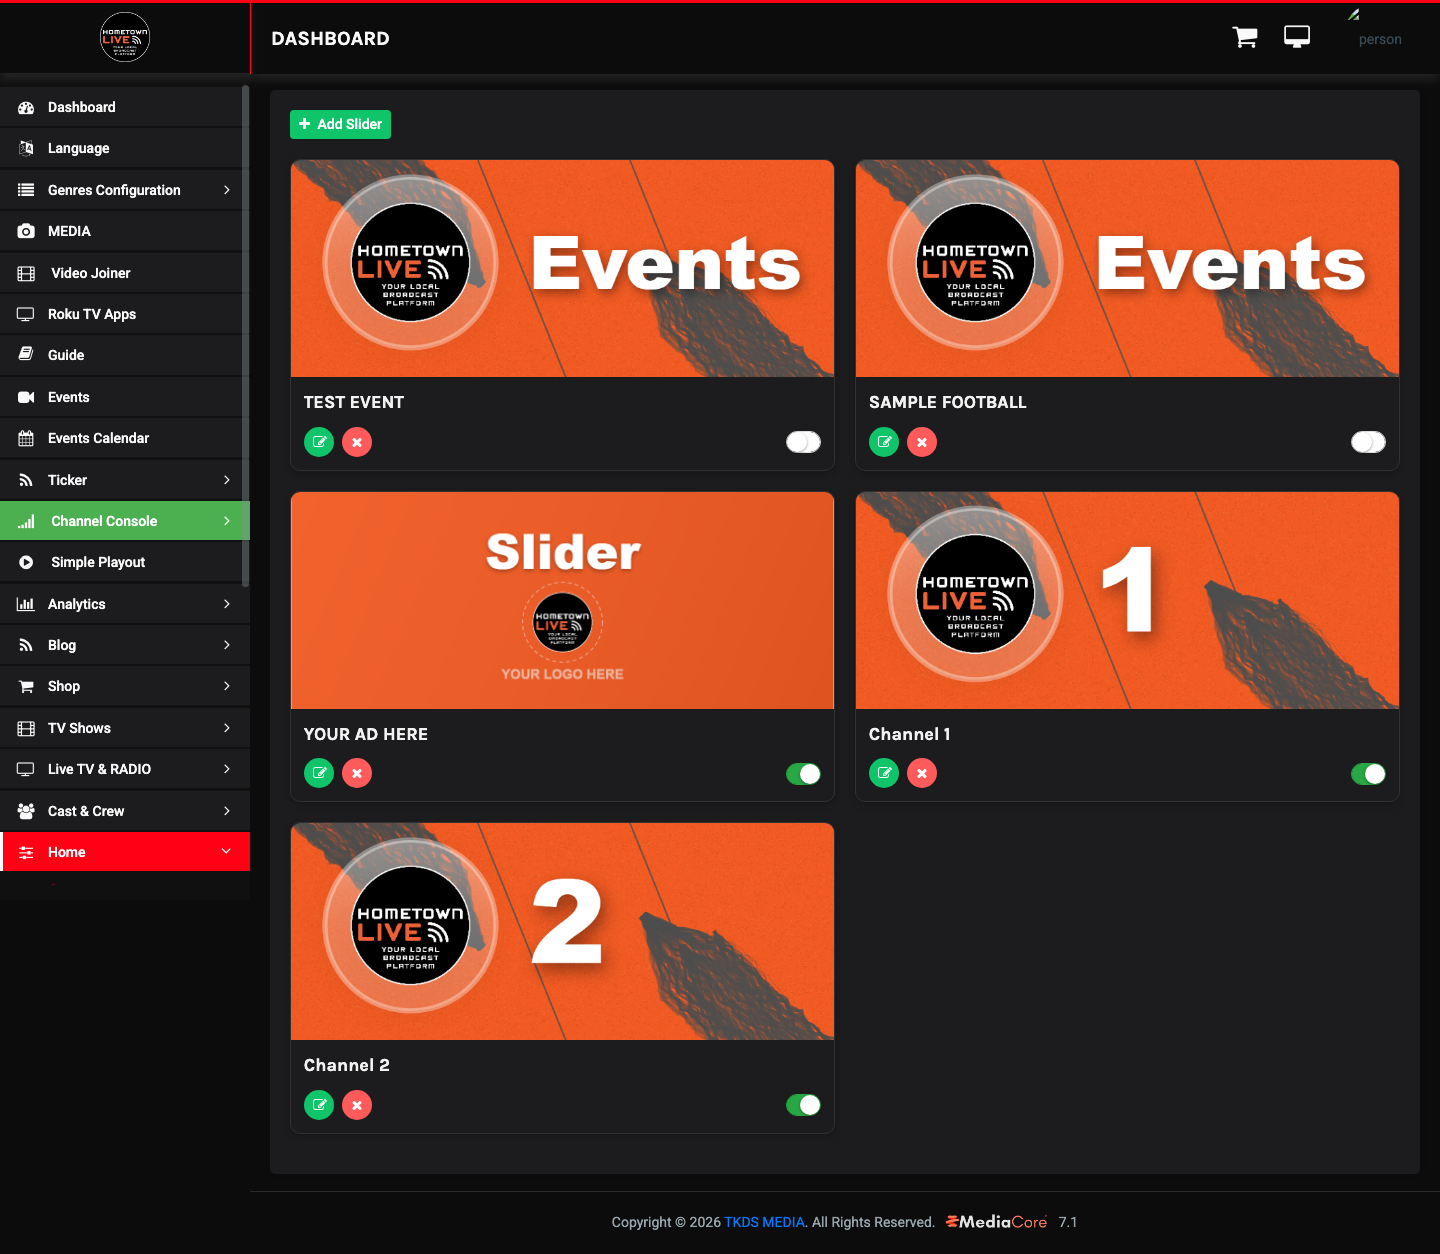
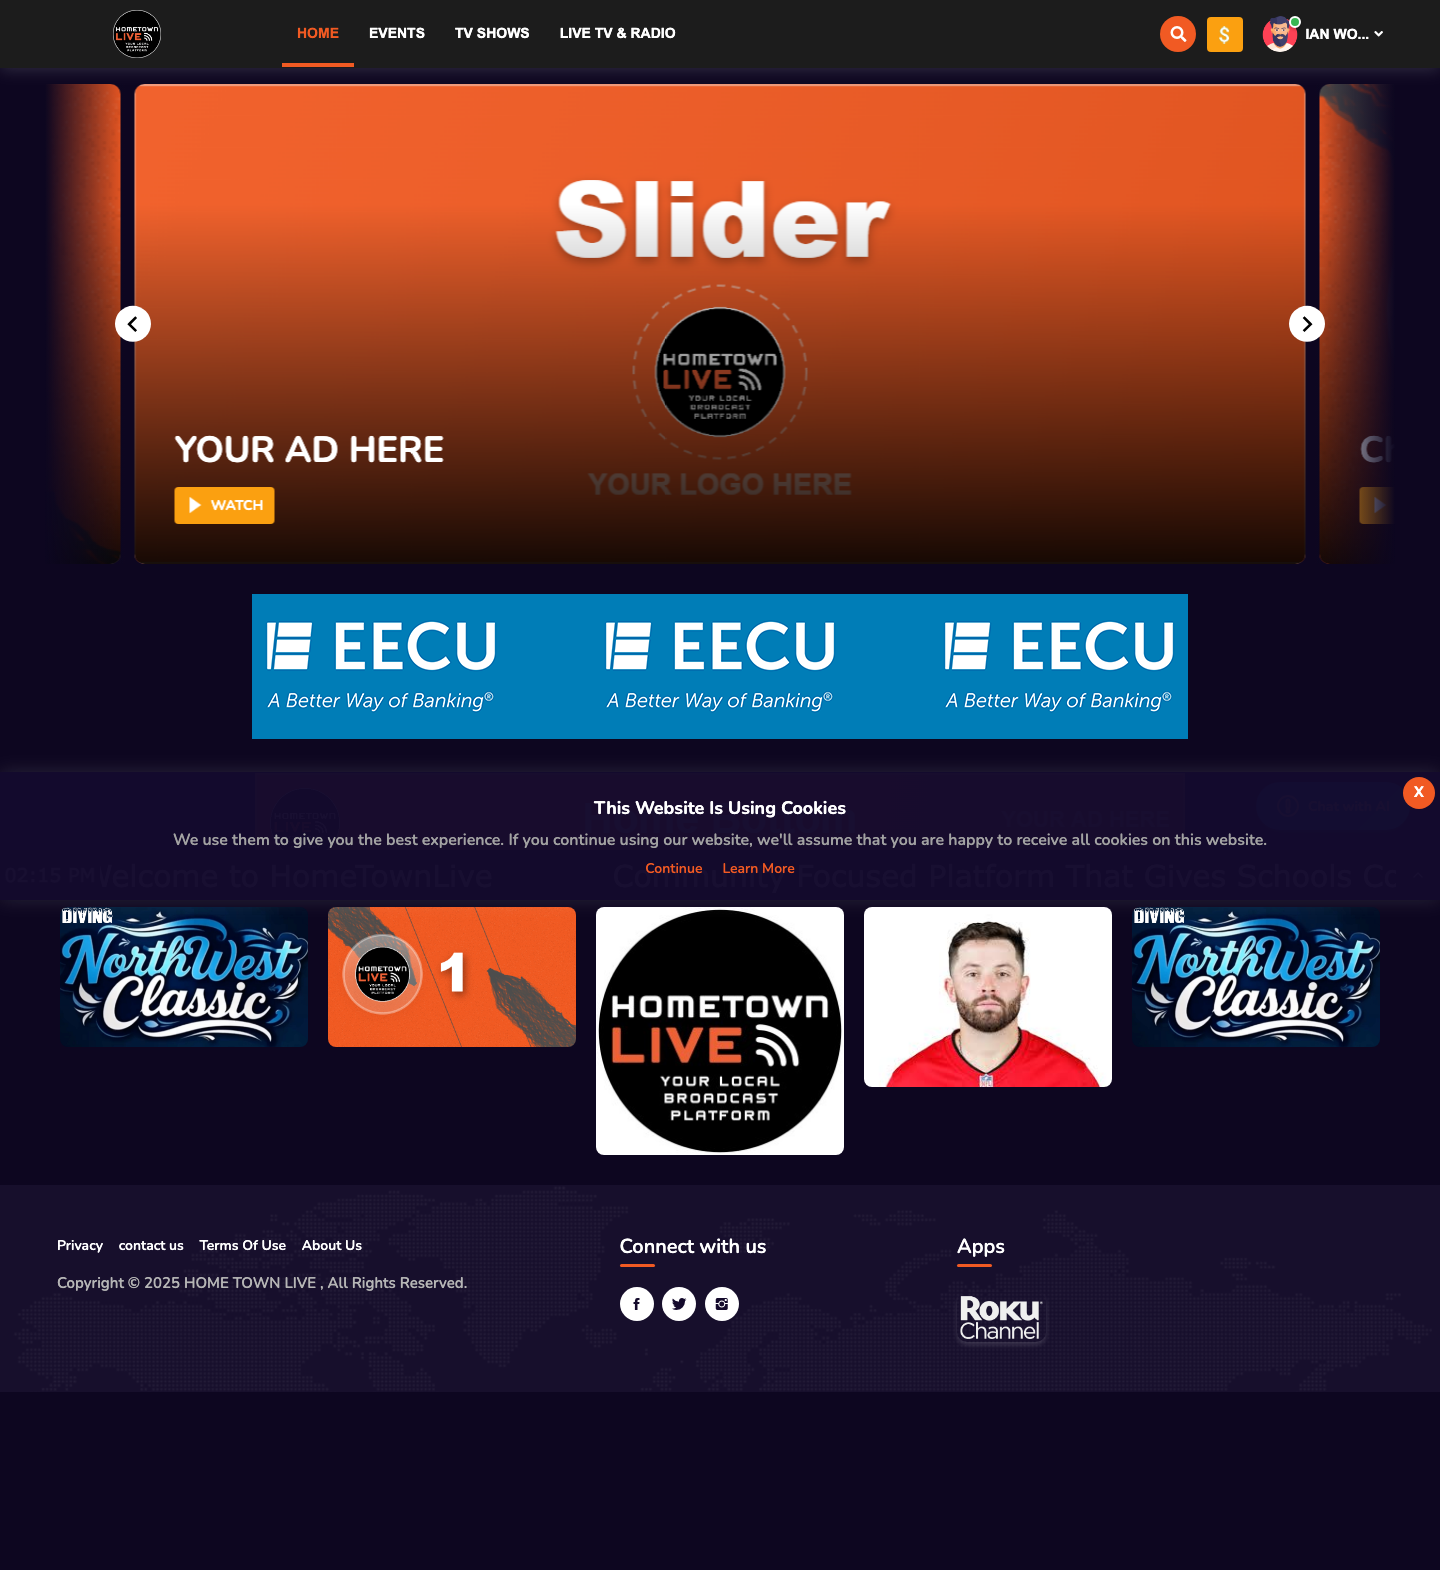
The Slider is the full-width hero banner at the top of the viewer homepage. Each slide links to an event, channel, or custom advertisement. The slider auto-rotates through all active slides on a timed interval. Use the slider to feature your most important upcoming events and most-watched channels.
Items from a typical demo installation:
- TEST EVENT
- SAMPLE FOOTBALL
- YOUR AD HERE
- Channel 1
- Channel 2
Each slider item has a Show/Hide toggle. Active items are visible to viewers. Inactive items are retained in the admin list for future use without appearing on the homepage.
Adding a Slider Item
- Click Add Slider.
- Select the content item to feature: an event, a channel, or a custom ad image.
- Toggle the item to Active to make it visible on the homepage.
- Click Save.

Ordering Slides
The slides appear to viewers in the order they are arranged in the admin list. To reorder:
- Drag a slide card to its new position in the list.
- The new order takes effect on the viewer homepage immediately.
Tip: Place your most important upcoming event or most active channel in the first slider position. The first slide is the one viewers see on page load before the carousel begins rotating.
Home Sections
Location: Sidebar → Home → Home Sections (/admin/home_sections)
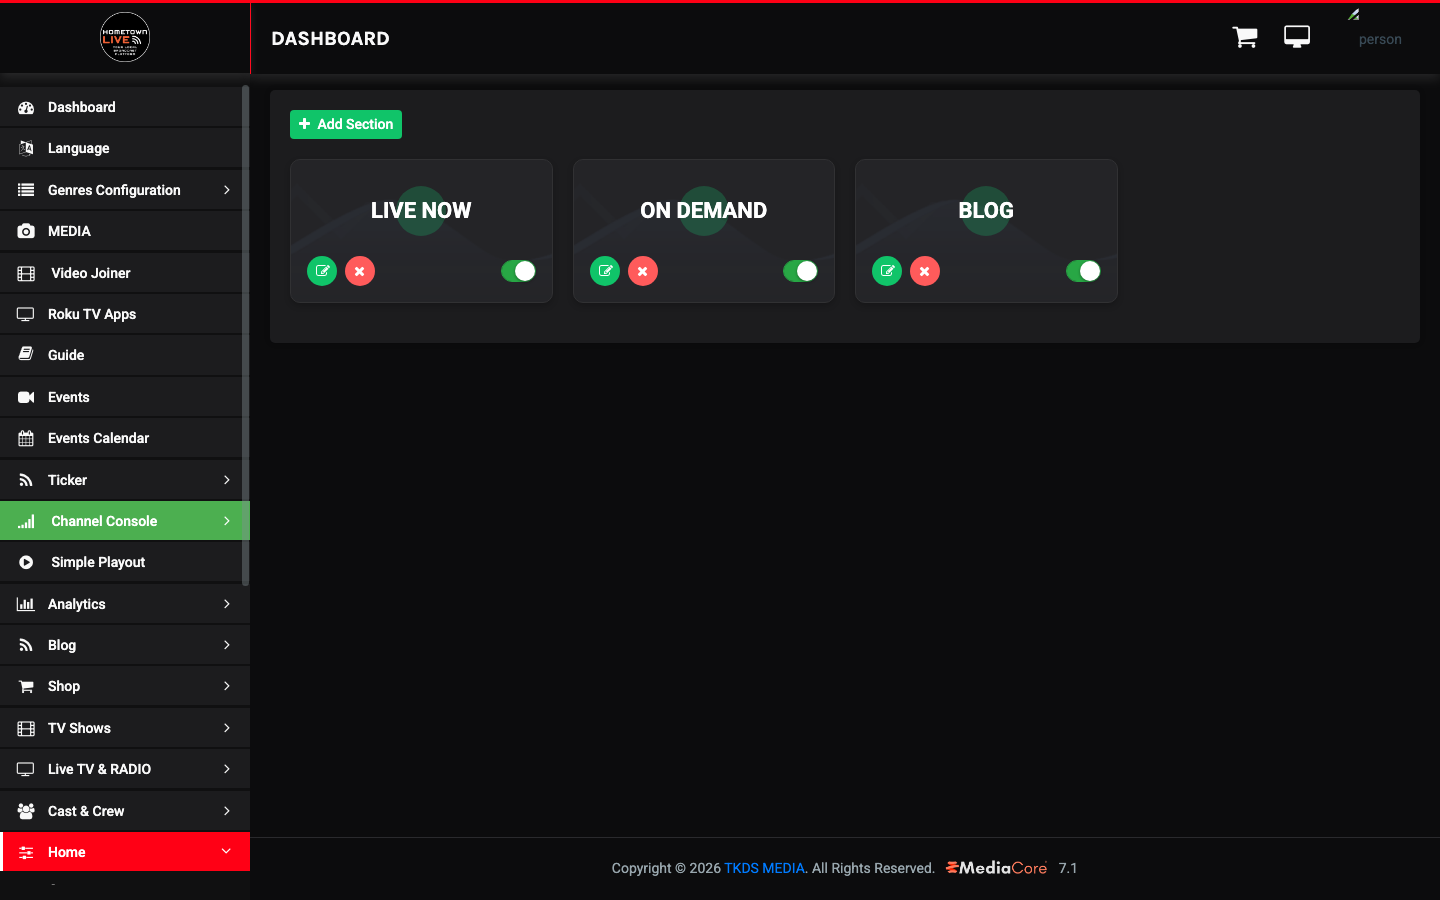
Home Sections control which content rows appear on the viewer homepage below the slider, and the order in which they display. Each section represents a horizontal row of content cards. Use sections to organize the homepage around the content types that matter most to your viewers.
Default sections on a new installation:
- LIVE NOW — displays events currently streaming live.
- ON DEMAND — displays available on-demand video content.
- BLOG — displays recent blog posts.
Each section has an ads toggle that controls whether advertisements appear within that section. Each section also has an Active/Inactive toggle that shows or hides the entire section.
Configuring a Home Section
- Click Add Section to create a new content row.
- To toggle an existing section's visibility, switch its Active toggle.
- To toggle ads within a section, switch its ads toggle.
- To reorder sections, drag them into the desired position.

Note: Deactivating a section hides it from viewers immediately without deleting it. This is useful for temporarily removing a section — for example, hiding the LIVE NOW section during the off-season.
Tip: The order of sections in the admin list matches exactly what viewers see on the homepage. Put the highest-priority content row first — typically LIVE NOW during active sports seasons.
Carousel
Location: Sidebar → Home → Carousel (/admin/carousel)
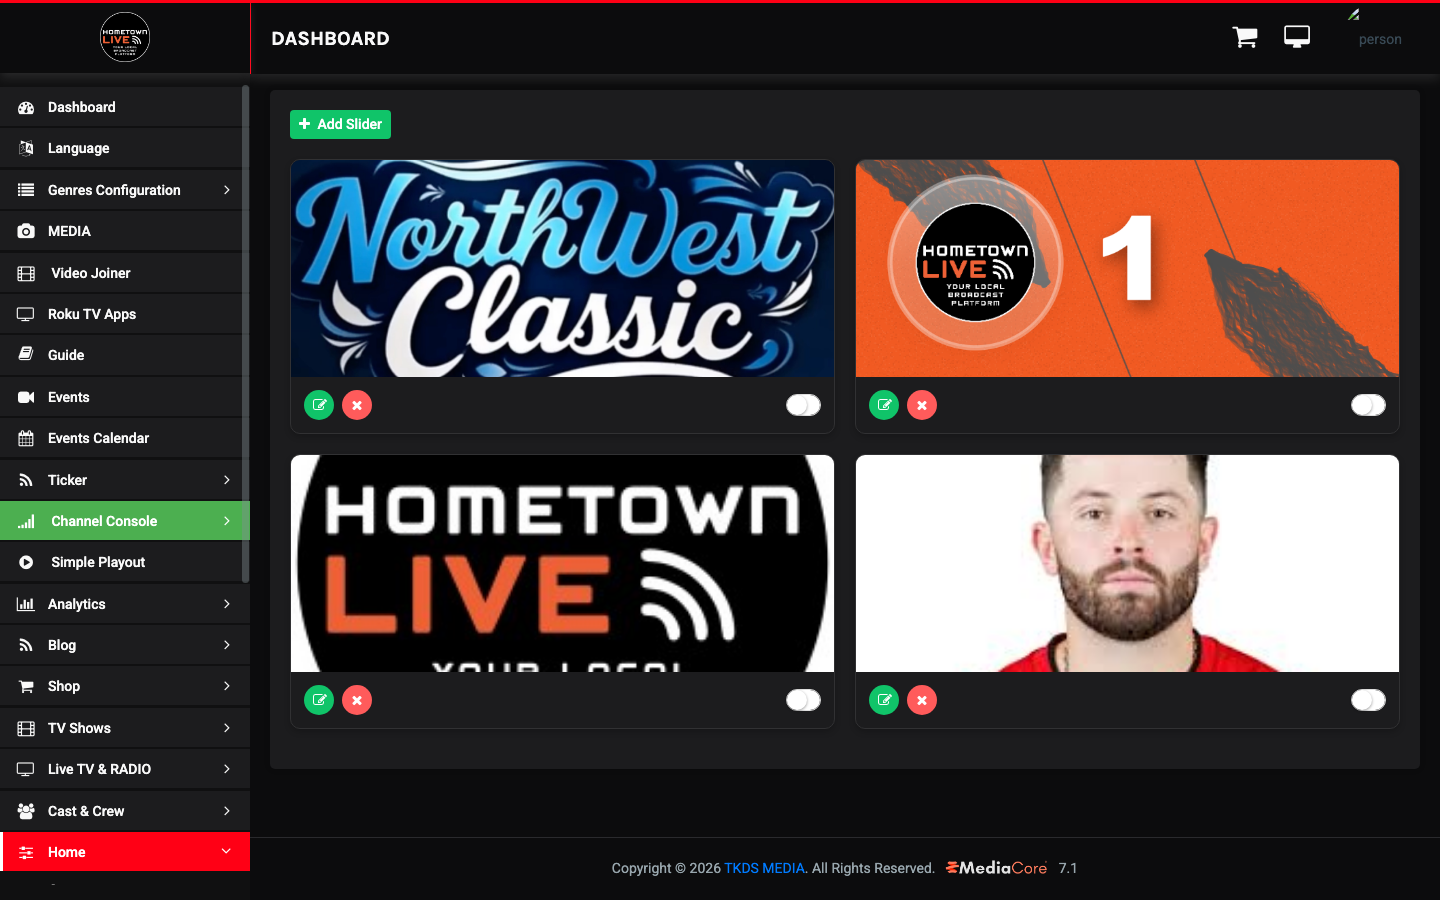
The Carousel is a secondary rotating image or content display, separate from the main hero Slider. It is typically placed in the middle or lower portion of the homepage to feature additional content, sponsors, or community announcements. Like the Slider, it supports multiple items that rotate on a timed interval.
Each carousel item has an ads toggle and an Active/Inactive toggle.
Adding a Carousel Item
- Click Add Slider.
- Select or upload the image or content item for this carousel position.
- Set the ads toggle based on whether ads should display within this carousel item.
- Toggle Active to make the item visible to viewers.
- Click Save.

Note: The Add Slider button in the Carousel section creates a carousel item, not a hero slider item. The hero Slider and the Carousel are separate features managed from separate admin pages.
Popup
Location: Sidebar → Home → Popup (/admin/popup)
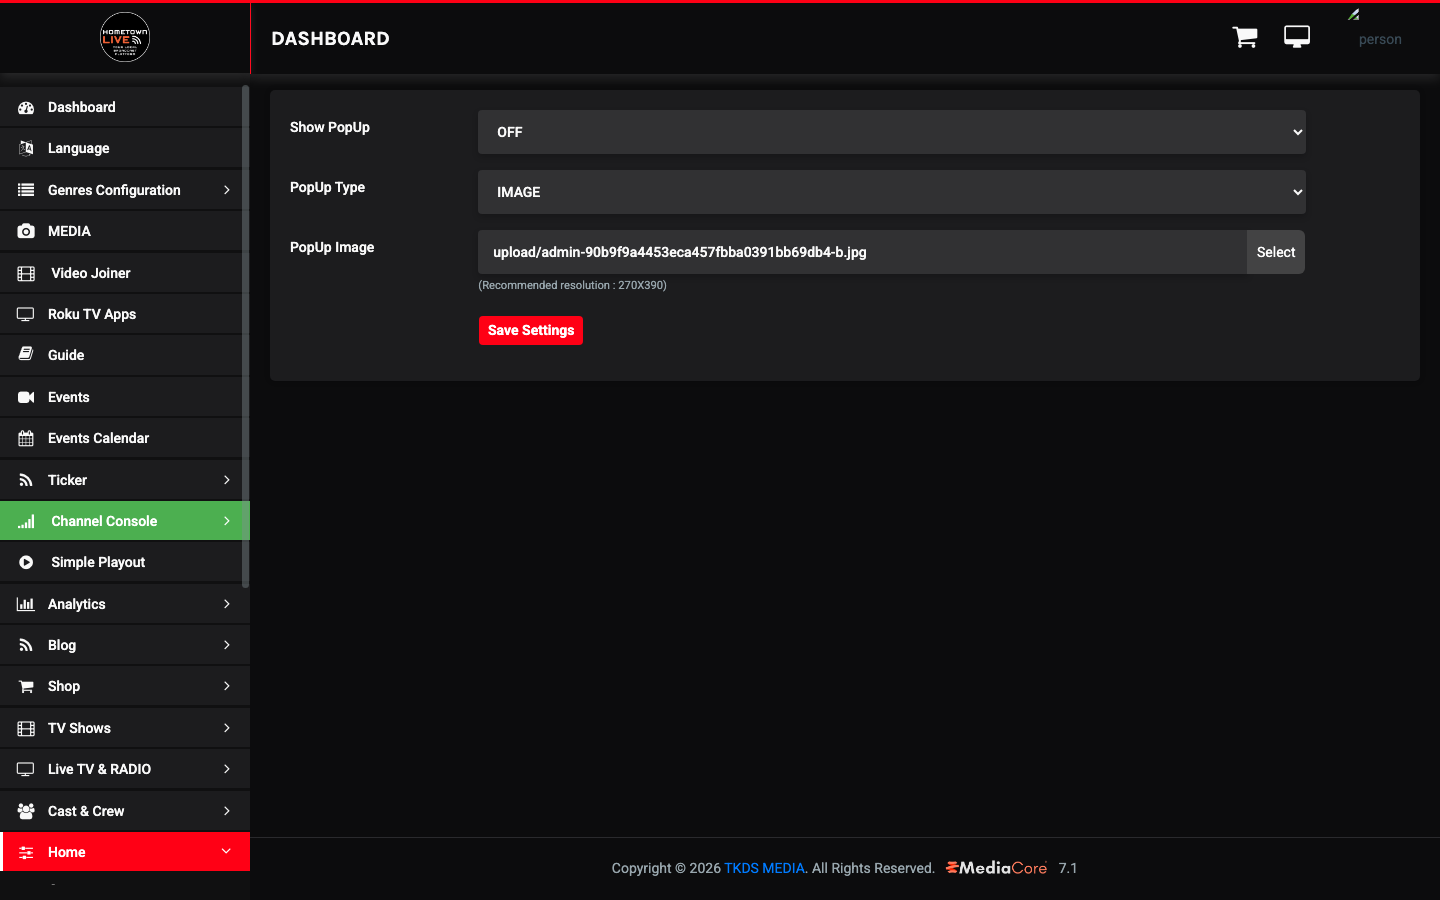
The Popup is an optional modal dialog shown to visitors on page load. Use it to announce upcoming events, promote a subscription offer, or display a welcome message to new visitors. The popup supports both a rich HTML message and a standalone image.
Popup Configuration Fields
| Field | Type | Description |
|---|---|---|
| Show Popup | Toggle (On/Off) | Whether the popup appears to visitors. Set to Off between announcements to avoid viewer fatigue. |
| Popup Type | Select | HTML — displays a rich-text message using the TinyMCE editor. IMAGE — displays an uploaded image as the popup content. |
| Popup Image | Image upload | The image displayed when Popup Type is set to IMAGE. Recommended resolution: 270×390 pixels. |
| Popup Content | Rich text editor (TinyMCE) | The HTML content displayed when Popup Type is set to HTML. Supports full text formatting, links, buttons, and embedded media. |
Configuring a Popup
- Navigate to Home → Popup.
- Set Show Popup to On.
- Select a Popup Type.
- If using IMAGE type: upload the image file in the Popup Image field. Keep the image at or near 270×390 pixels for best display quality.
- If using HTML type: use the TinyMCE editor in the Popup Content field to compose your message. You can format text, add links, and embed images.
- Click Save Settings.
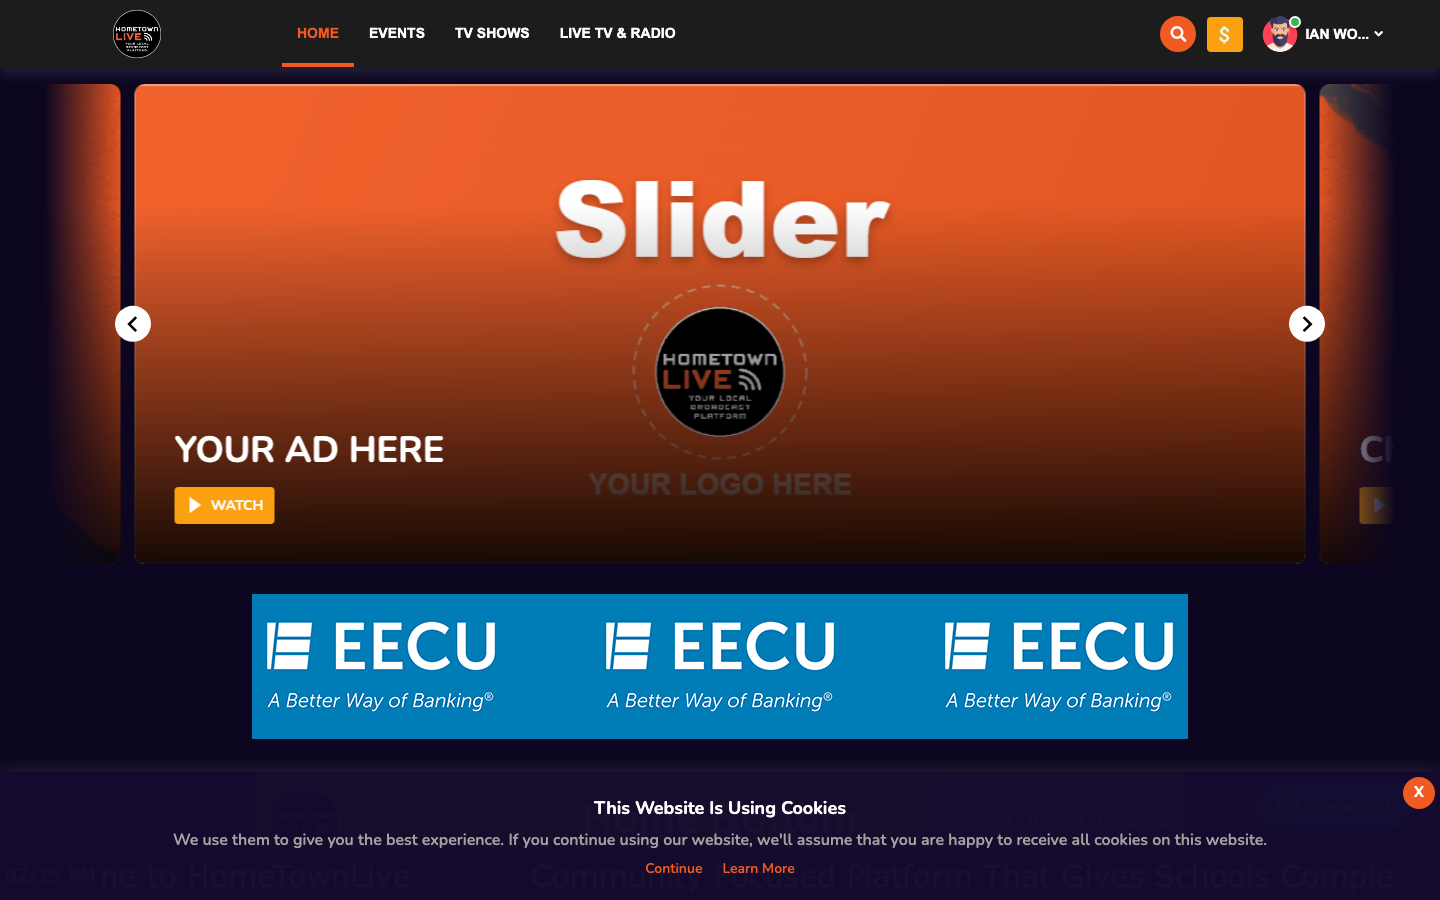
Warning: The popup displays on every visitor's first page load. Keep the message concise and directly relevant to the current announcement. Long popups cause viewers to dismiss them without reading, and showing a popup with outdated content creates a poor first impression.
Tip: Use the popup for high-impact announcements only — such as "Season passes now on sale" or "Watch the championship live tonight." Turn it off as soon as the announcement is no longer timely.
Menu Settings
Location: Sidebar → Settings → Menu (/admin/settings/menu)
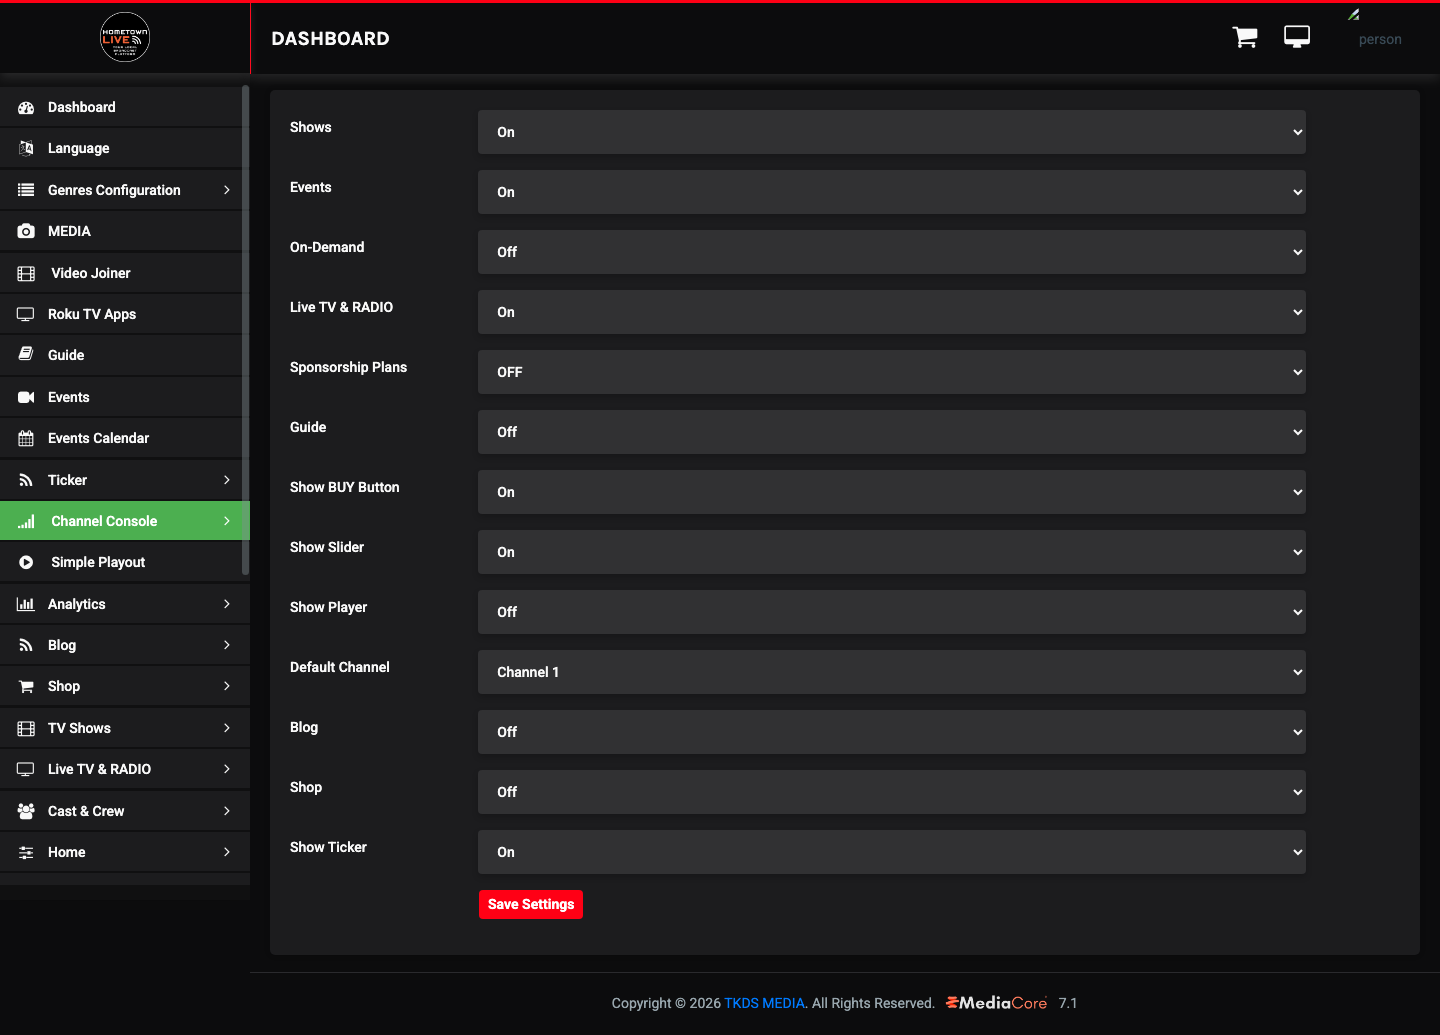
The Menu Settings page controls which sections appear in the top navigation bar on the viewer site and which homepage features are enabled. Each toggle takes effect immediately on the viewer-facing site when saved.
| Toggle | Default | What It Controls |
|---|---|---|
| Shows On/Off | On | Whether the TV Shows navigation item appears in the viewer menu. |
| Events On/Off | On | Whether the Events navigation item appears in the viewer menu. |
| On-Demand On/Off | On | Whether the On-Demand navigation item appears in the viewer menu. |
| Live TV & Radio On/Off | On | Whether the Live TV & Radio navigation item appears in the viewer menu. |
| Sponsorship Plans On/Off | On | Whether the Sponsorship Plans navigation item appears in the viewer menu. |
| Guide On/Off | On | Whether the program Guide navigation item appears in the viewer menu. |
| Show BUY Button On/Off | On | Whether the subscription purchase button is displayed prominently in the navigation. |
| Show Slider On/Off | On | Whether the hero Slider is displayed on the homepage. |
| Show Player On/Off | On | Whether the default video player is shown on the homepage. |
| Default Channel | Select | Which channel plays by default on the homepage player. |
| Blog On/Off | On | Whether the Blog navigation item appears in the viewer menu. |
| Shop On/Off | On | Whether the Shop navigation item appears in the viewer menu. |
| Show Ticker On/Off | Off | Whether the scrolling Ticker bar appears at the bottom of the viewer site. |
Note: Disabling a navigation item in Menu Settings hides it from viewers but does not delete the associated content. For example, turning off Events removes the Events menu item, but existing event records are preserved and the toggle can be turned back on at any time.
Enabling the Ticker from Menu Settings
The ticker bar does not appear on the viewer site until you explicitly enable it here.
- Navigate to Settings → Menu.
- Locate the Show Ticker On/Off toggle.
- Set it to On.
- Click Save.
Tip: Review Menu Settings when launching a new season or rolling out a new feature. Enabling or disabling navigation items is the fastest way to control which parts of the platform are surfaced to viewers without removing any data.
Still need help?
Can't find what you're looking for? Our support team is here to help.
Contact Support →