
Blog & Shop
Managing blog posts, categories, shop products, orders, and inventory.
Blog and Shop
The Blog and Shop features give your organization a way to publish content and sell branded merchandise directly through the HometownLive platform. Both sections are accessible from the admin sidebar and can be enabled or disabled from Settings → Menu.
Blog
The Blog lets you publish articles, announcements, and stories for your community. Posts are organized by category, can be featured on the home page, and are accessible to viewers at /blog when the Blog menu item is enabled.
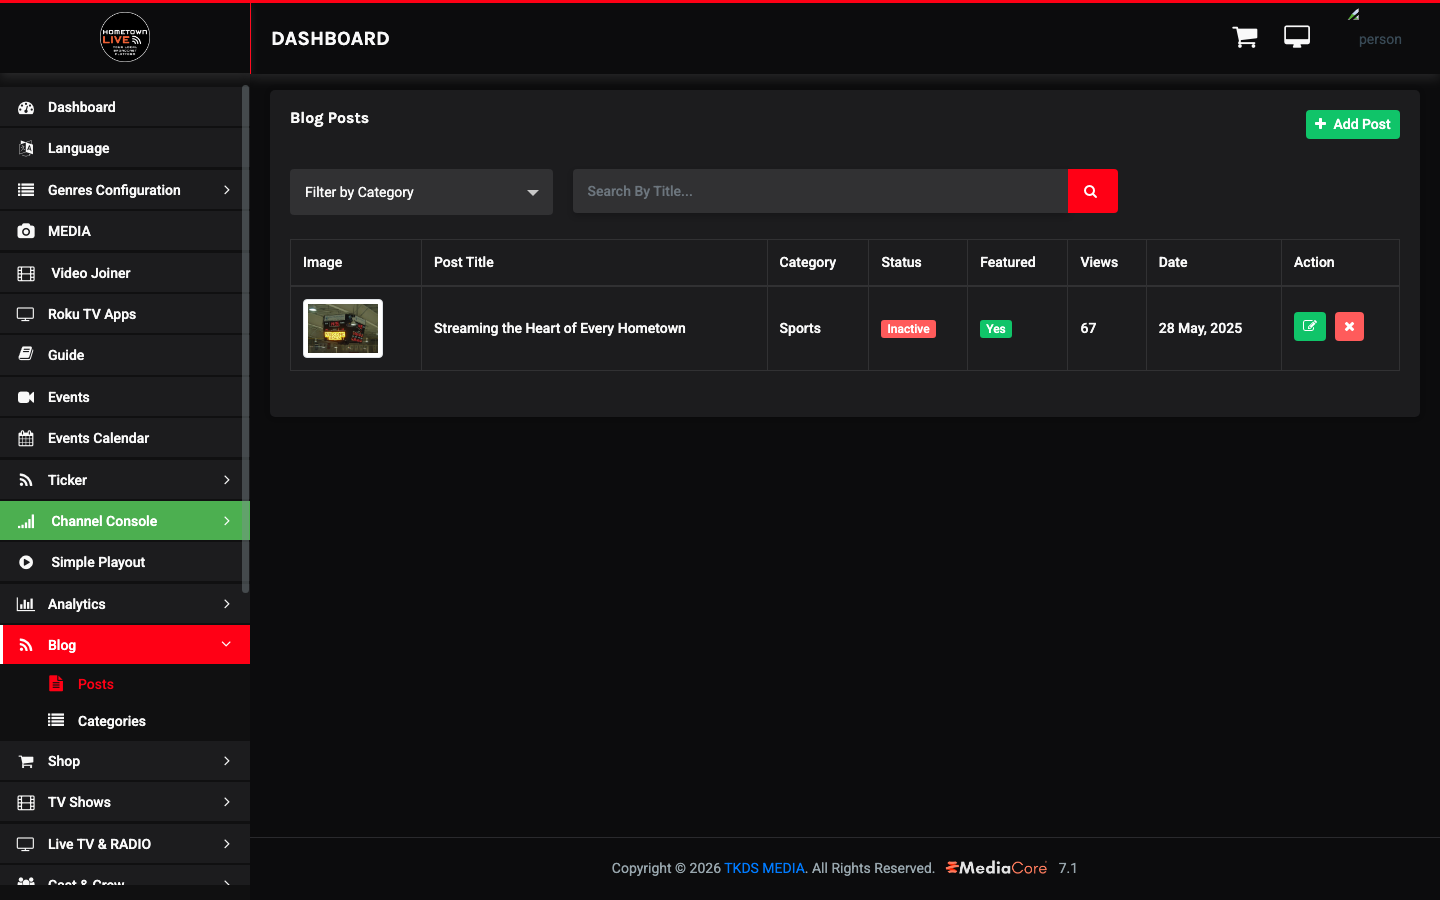
Blog Posts (/admin/blog/posts)
The blog posts table shows all published and draft articles. Each row displays the post thumbnail, title, category, status, featured flag, view count, and publish date.
The Filter by Category dropdown narrows the list to posts in a specific category. Use this when managing large volumes of content across multiple topics.
| Column | Description |
|---|---|
| Image | Thumbnail uploaded as the featured image for the post. |
| Post Title | The title of the article as it appears on the viewer-facing blog. |
| Category | The blog category this post is assigned to (e.g., Sports, Fine Arts). |
| Status | Active posts are visible to viewers. Inactive posts are hidden. |
| Featured | Yes/No — featured posts are highlighted in the blog listing and may appear in home sections. |
| Views | Total view count since the post was published. |
| Date | The publish date of the post. |
| Action | Edit or delete the post. |
Creating a Blog Post
- In the admin sidebar, click Blog → Posts.
- Click Add Post.
- Fill in the required fields (see field reference below).
- Click Save to publish or save as inactive.
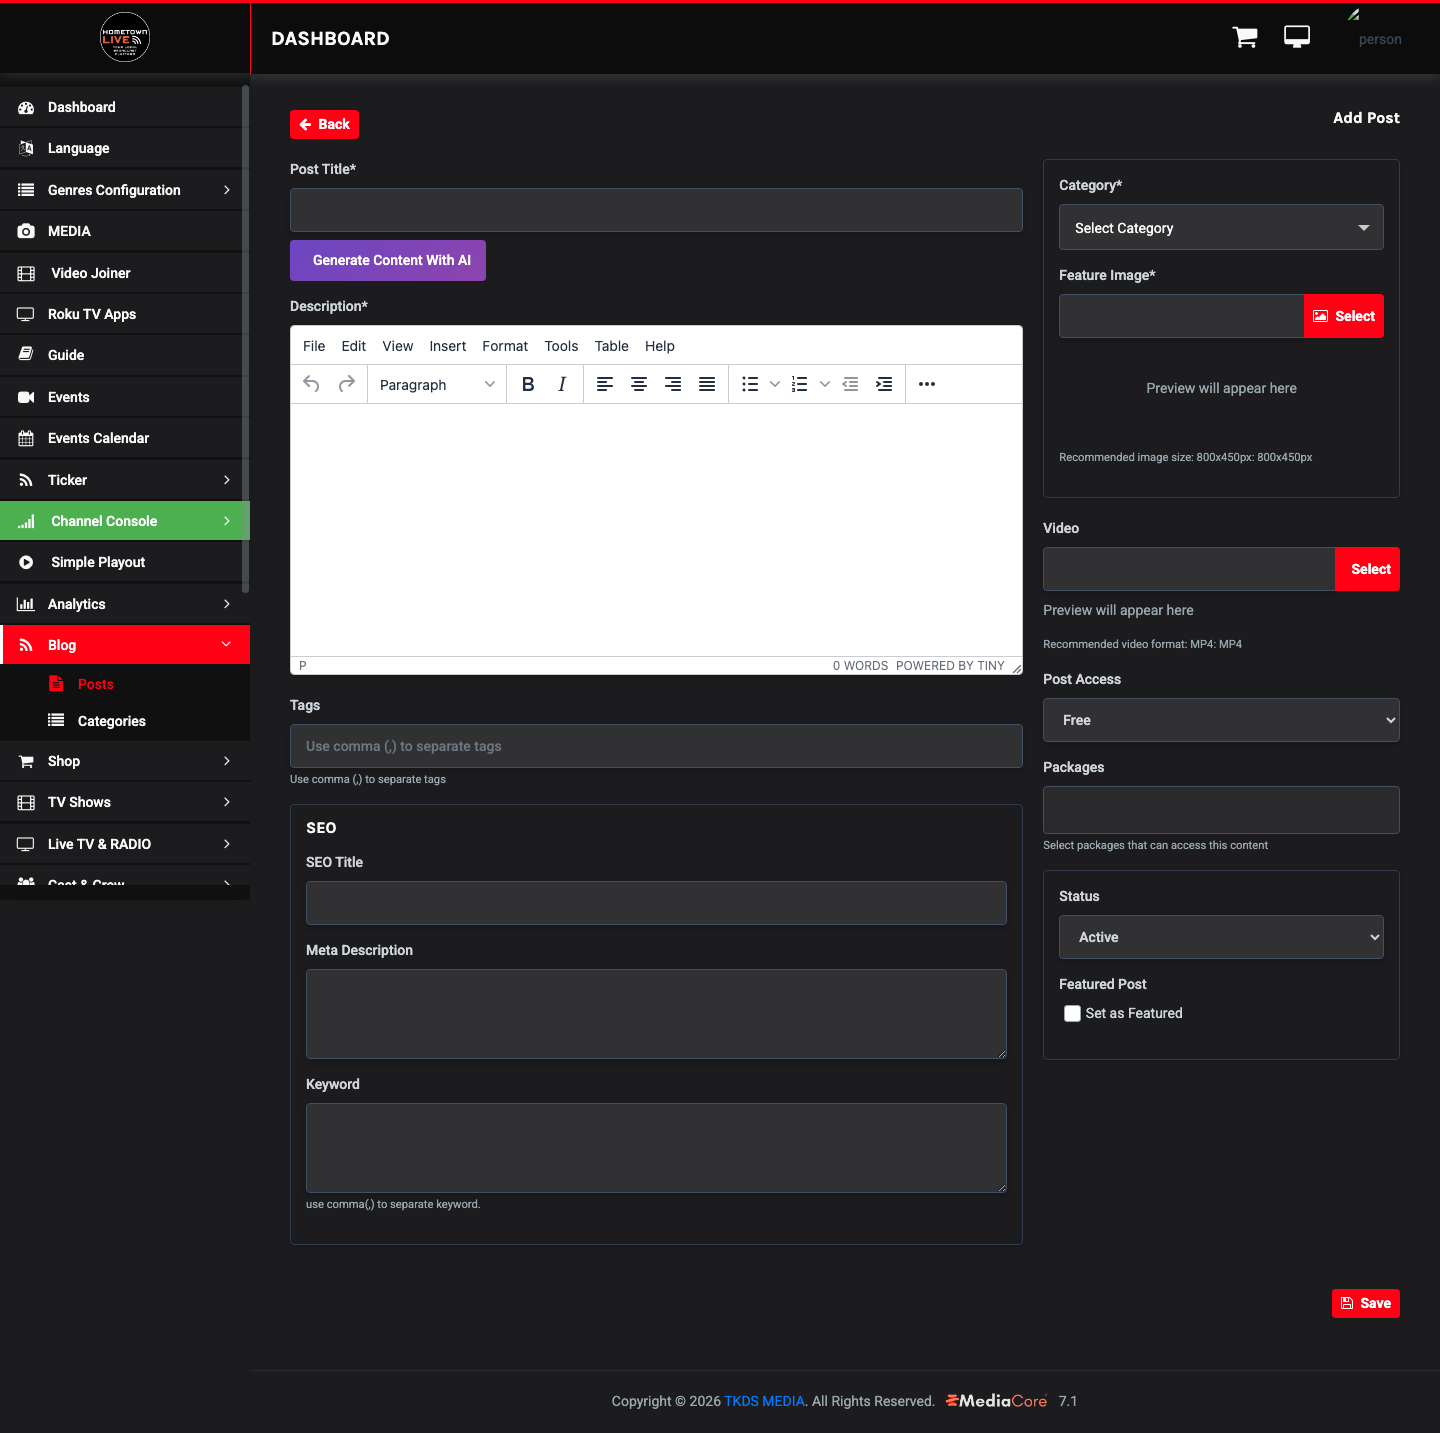
| Field | Description | Notes |
|---|---|---|
| Title | The post headline shown on the blog listing and post page. | Keep titles concise — under 70 characters displays best. |
| Featured Image | The thumbnail image shown in the blog grid and at the top of the post. | Upload a landscape image. Recommended minimum width: 800px. |
| Category | The category this post belongs to. | Categories must be created before assigning them. See Blog Categories. |
| Status | Active makes the post visible to viewers. Inactive hides it. | Use Inactive to draft posts before they are ready. |
| Featured | Toggle On to mark this post as featured. | Featured posts may be highlighted in the blog listing or home sections. |
| Content | The body of the post, written in the TinyMCE rich text editor. | Supports text formatting, images, links, and embedded media. |
Tip: Write the post in Inactive status first. Review it on the viewer-facing site using an admin account before switching it to Active.
Editing a Blog Post
- In the posts table, click the Action button for the post you want to edit.
- Click Edit.
- Make changes and click Save.
Note: Changes to a live (Active) post take effect immediately after saving.
Deleting a Blog Post
- In the posts table, click the Action button for the post.
- Click Delete.
- Confirm the deletion.
Warning: Deleting a blog post is permanent. The post and its view history cannot be recovered. Use the Inactive status to hide posts without deleting them.
Blog Categories (/admin/blog/categories)
Categories organize your blog posts into topics. Each post must be assigned to a category. Create categories before creating posts that use them.
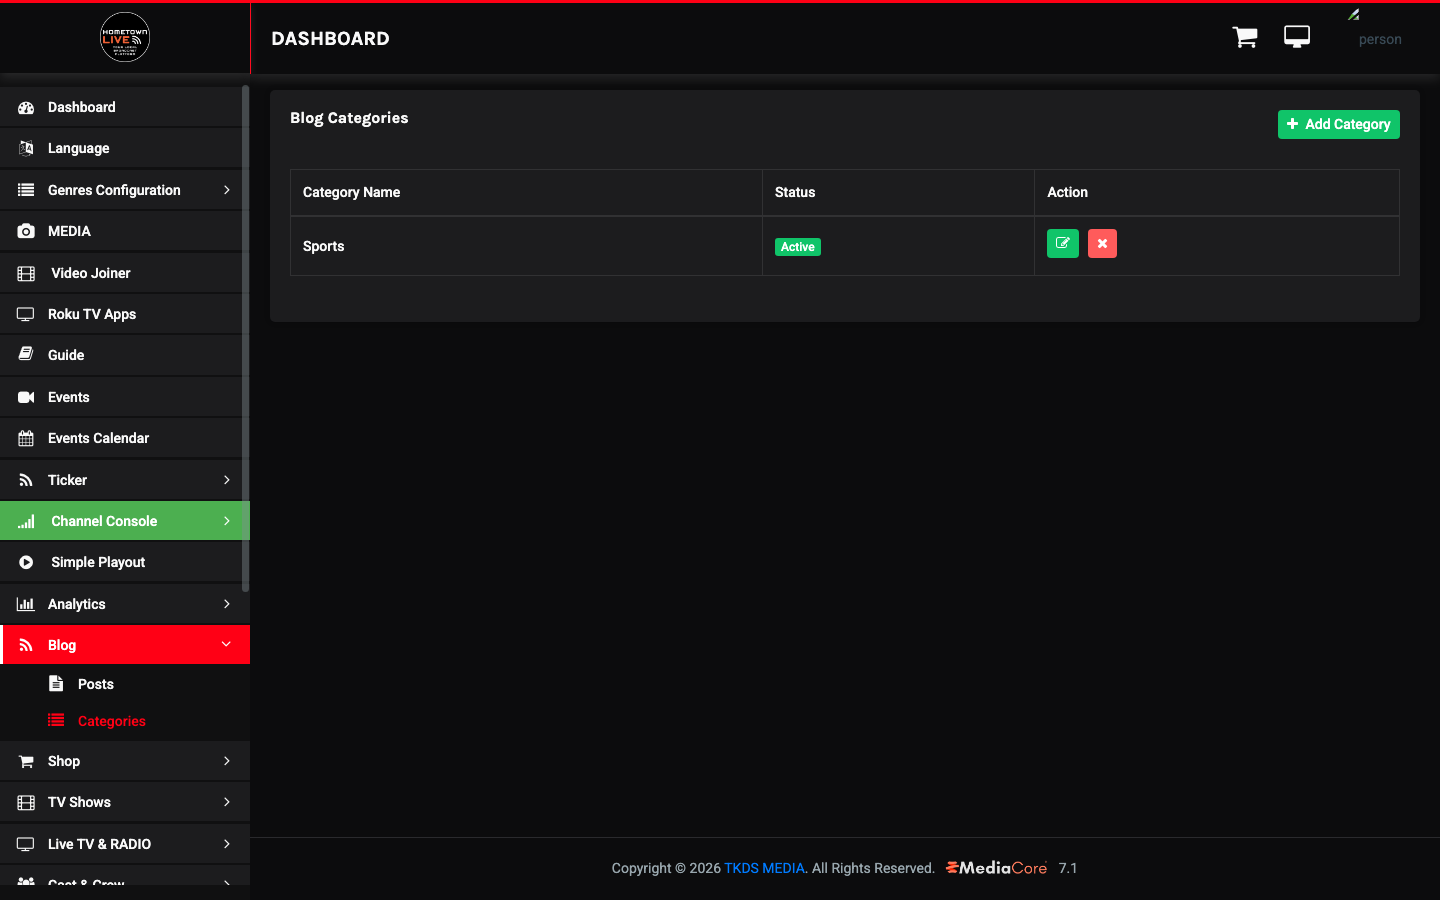
| Column | Description |
|---|---|
| Category Name | The label displayed to viewers in the blog filter menu. |
| Status | Active categories are visible and available for post assignment. Inactive categories are hidden from viewers. |
| Action | Edit or delete the category. |
Adding a Category
- Click Add Category.
- Enter a Category Name (e.g., Sports, Fine Arts, Announcements).
- Set Status to Active.
- Click Save.
Note: Deactivating a category hides it from viewers but does not hide posts assigned to it. To hide all posts in a category, set each post to Inactive individually.
Viewer-Facing Blog
When the Blog menu item is enabled in Settings → Menu, viewers can browse posts at https://platform.hometownlive.tv/blog. Posts are displayed in a grid with the featured image, title, category label, and publish date.
Viewers can filter posts by category using the filter controls on the blog page. Only Active posts in Active categories are visible.
Tip: Enable the Blog menu item in Settings → Menu → Blog to make the blog accessible from the main navigation. See the Settings chapter for menu configuration.
Shop
The Shop lets your organization sell branded merchandise — school spirit gear, apparel, and other items — directly through the HometownLive platform. The shop includes products, categories, size and color attributes, tags, and an order management workflow.
Note: The viewer-facing shop appears in the navigation when the Shop menu item is enabled in Settings → Menu.
Product Categories (/admin/product/categories)
Product categories organize your merchandise into logical groups (e.g., Apparel, Accessories, Spirit Wear). Categories are required — every product must be assigned to one.
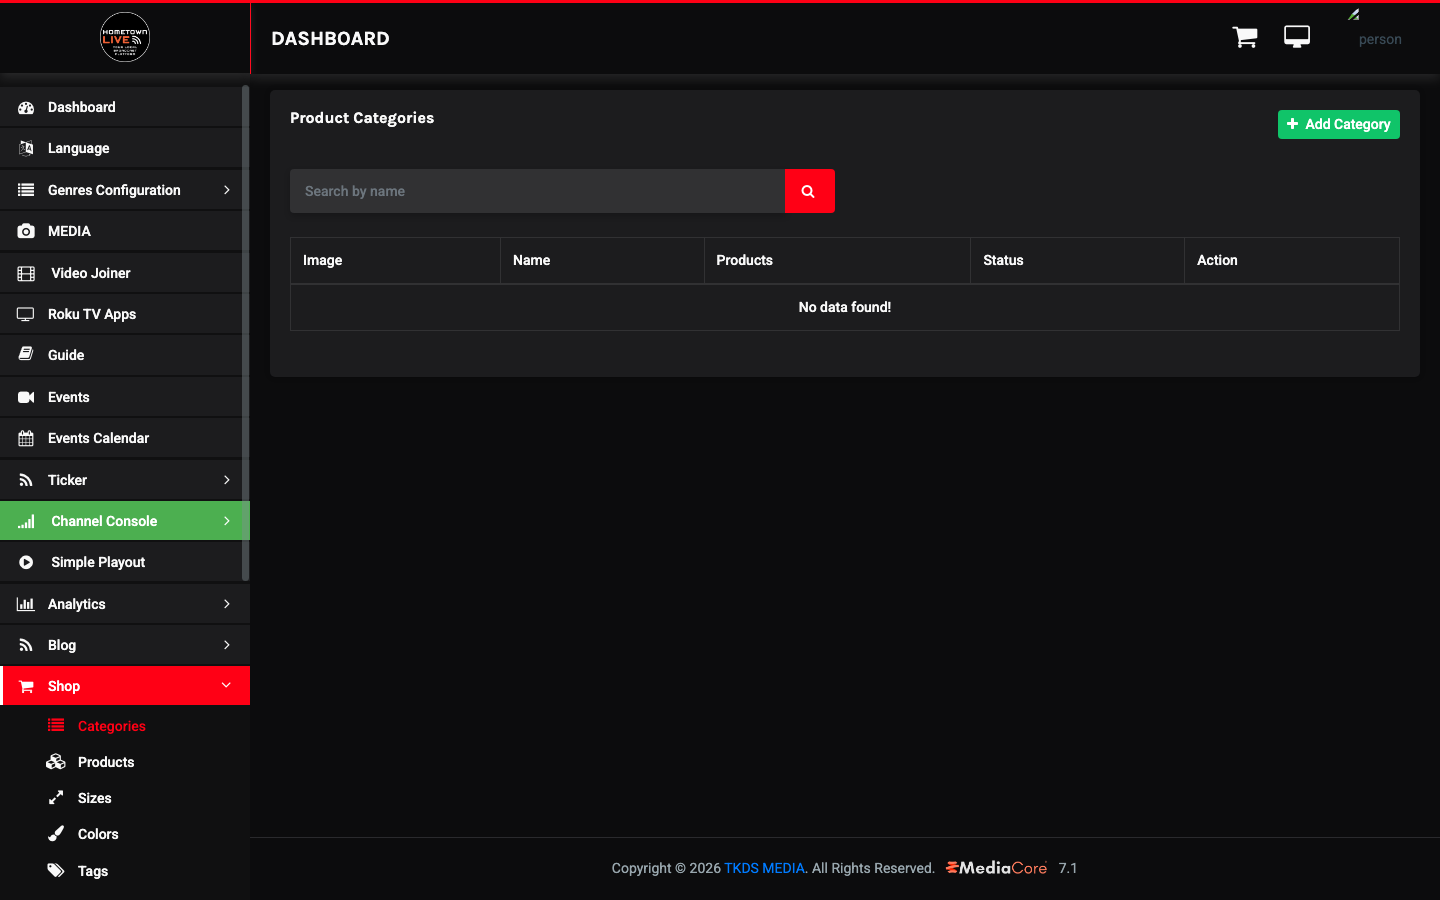
| Column | Description |
|---|---|
| Image | A category thumbnail or banner image displayed in the shop. |
| Name | The category label shown to viewers in the shop navigation. |
| Products | The count of products assigned to this category. |
| Status | Active categories are visible in the shop. Inactive categories are hidden. |
| Action | Edit or delete the category. |
Adding a Product Category
- In the admin sidebar, click Shop → Product Categories.
- Click Add Category.
- Enter a Name and upload an optional Image.
- Set Status to Active.
- Click Save.
Products (/admin/products)
The Products page lists all items available in your shop. Each product has a name, category, price, stock level, and optional attributes like sizes, colors, and tags.
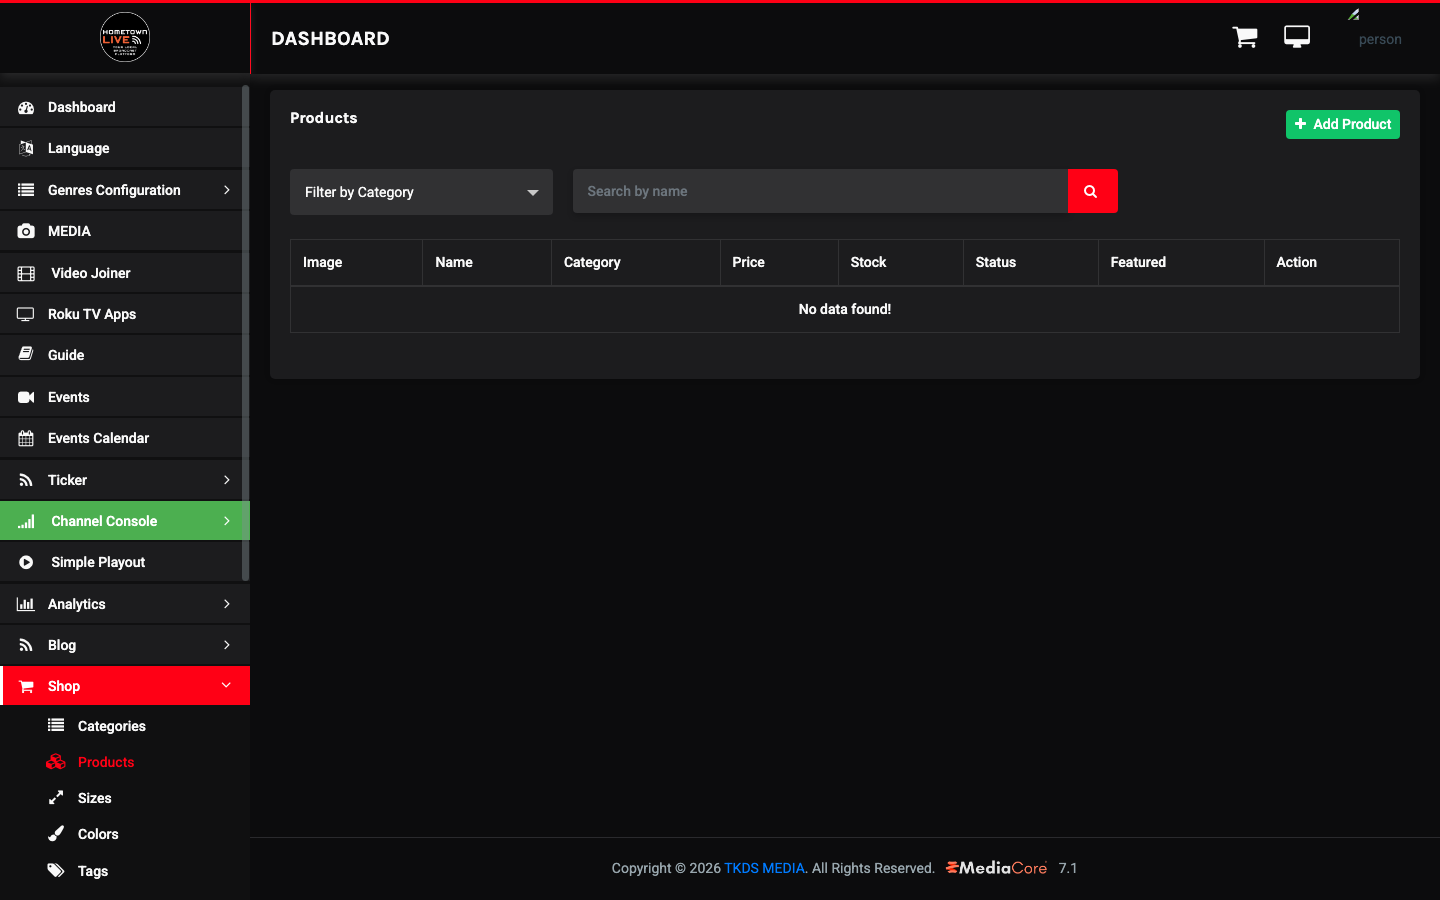
| Column | Description |
|---|---|
| Image | The primary product photo displayed in the shop grid. |
| Name | The product name shown to viewers. |
| Category | The product category this item belongs to. |
| Price | The listed price for this product. |
| Stock | Current inventory quantity. A stock of 0 marks the item as out of stock. |
| Status | Active products are visible in the shop. Inactive products are hidden. |
| Featured | Featured products may be highlighted on the shop home page. |
| Action | Edit or delete the product. |
Adding a Product
- Click Add Product.
- Complete the product fields (see reference below).
- Assign any applicable Sizes, Colors, and Tags.
- Set Status to Active when the product is ready to sell.
- Click Save.
| Field | Description |
|---|---|
| Name | The product title displayed in the shop. |
| Category | The product category. Must be created in Product Categories first. |
| Price | The selling price. Use the configured currency (set in General Settings). |
| Stock | Starting inventory quantity. Decrements with each order. |
| Status | Active = visible in shop. Inactive = hidden from viewers. |
| Featured | Toggle On to feature this product in highlighted positions. |
| Sizes | Select applicable size options (must be defined in Sizes first). |
| Colors | Select applicable color options (must be defined in Colors first). |
| Tags | Add descriptive tags to improve searchability and filtering. |
| Image | Upload the primary product photo. |
Tip: Upload high-quality product photos with a clean background. Clear images increase purchase confidence for viewers browsing the shop.
Sizes (/admin/sizes)
Sizes define the size options that can be assigned to products (e.g., S, M, L, XL, 2XL). Create all needed sizes before creating products that require them.
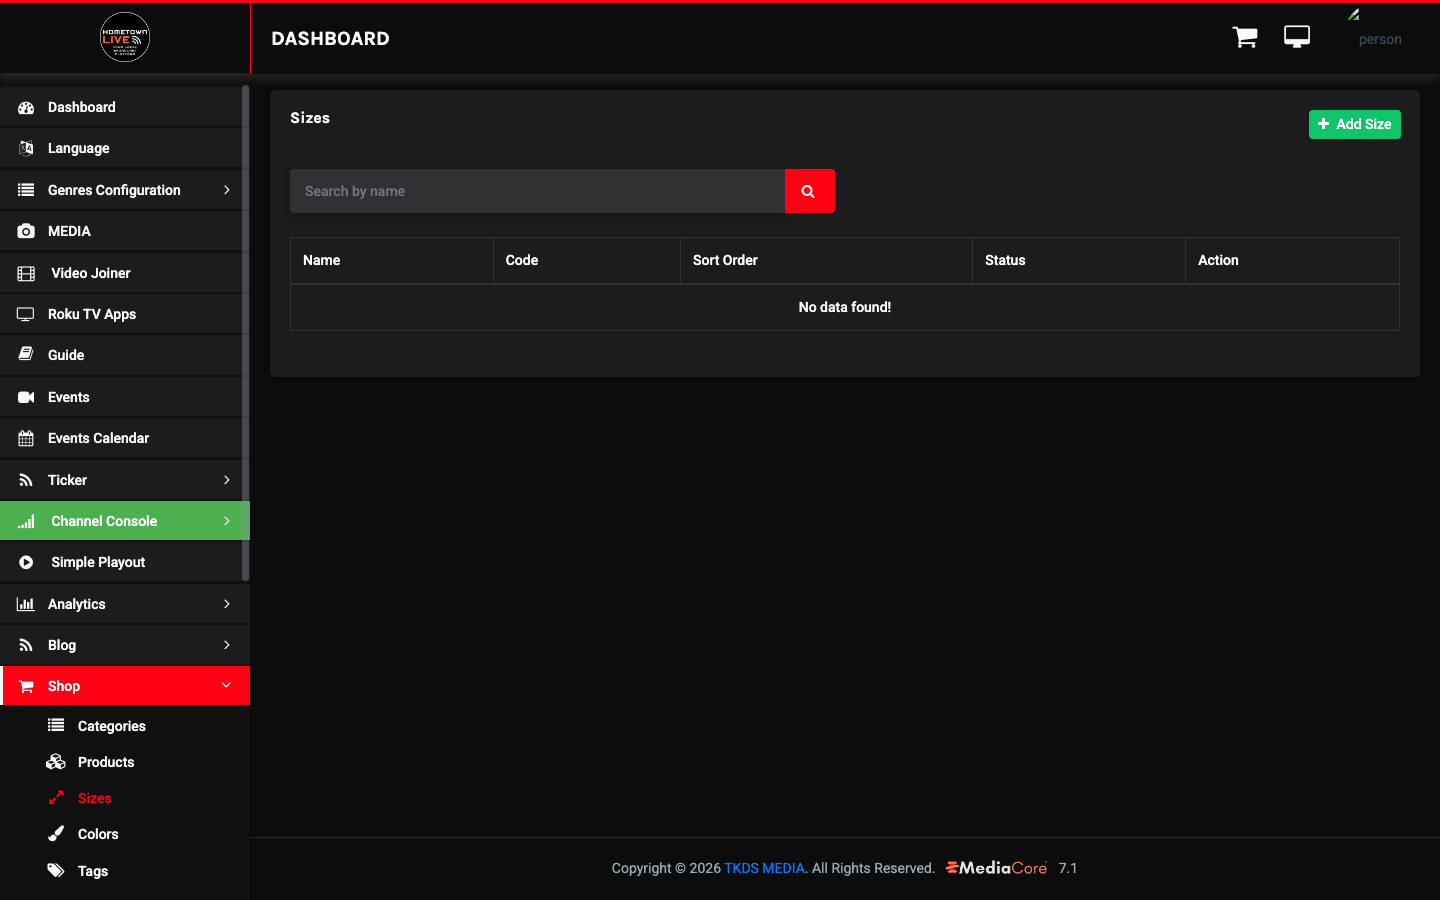
| Column | Description |
|---|---|
| Name | The label displayed to viewers when selecting a size (e.g., Small, Large, Extra Large). |
| Code | A short code used internally (e.g., S, L, XL). |
| Sort Order | Controls the order sizes appear in product listings. Lower numbers appear first. |
| Status | Active sizes are available for assignment to products. |
| Action | Edit or delete the size. |
Adding a Size
- Click Add Size.
- Enter the Name, Code, and Sort Order.
- Set Status to Active.
- Click Save.
Note: Sort order determines the display sequence when a buyer selects a size on the product page. Set sizes in logical order (e.g., XS=1, S=2, M=3, L=4, XL=5).
Colors (/admin/colors)
Colors define the color options that can be assigned to products (e.g., Black, White, Cardinal Red). A hex code controls the color swatch displayed to viewers.
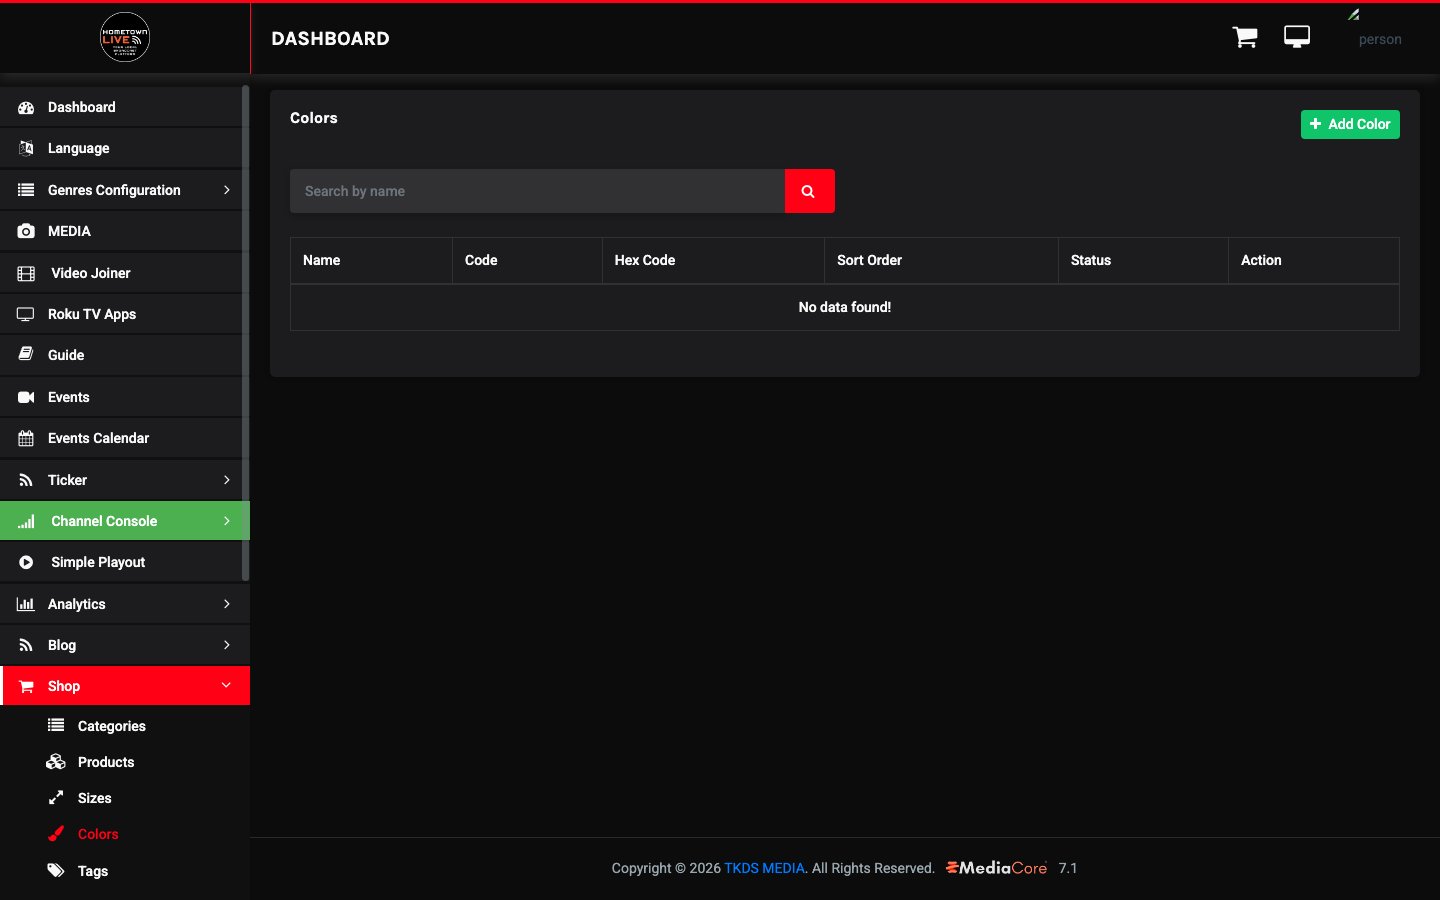
| Column | Description |
|---|---|
| Name | The color label displayed to viewers (e.g., Black, White, Navy). |
| Code | A short internal code (e.g., BLK, WHT, NVY). |
| Hex Code | The HTML hex color value (e.g., #000000). Used to display a color swatch in the product selector. |
| Sort Order | Controls the order colors appear on the product page. |
| Status | Active colors are available for product assignment. |
| Action | Edit or delete the color. |
Adding a Color
- Click Add Color.
- Enter the Name, Code, and Hex Code.
- Set a Sort Order.
- Set Status to Active.
- Click Save.
Tip: Use the official hex values for your school colors to ensure swatches are accurate. Your school's brand guide should list these.
Tags (/admin/tags)
Tags are descriptive labels that can be applied to products for filtering and search (e.g., "New Arrival", "Spirit Wear", "Clearance"). Tags are optional but improve the browsing experience in a large shop.
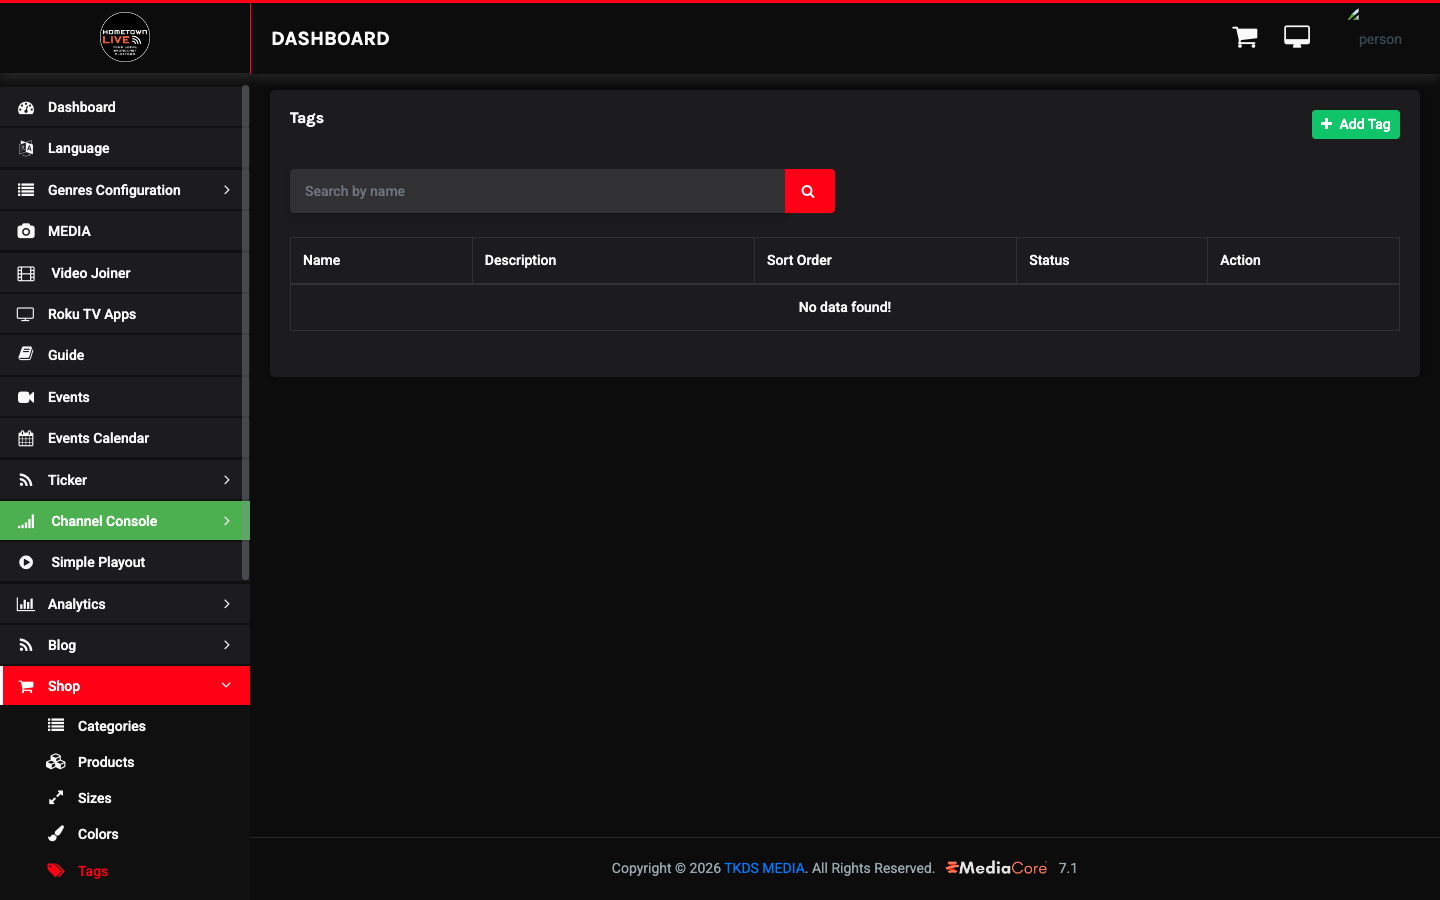
Adding a Tag
- Click Add Tag.
- Enter a Name and optional Description.
- Set a Sort Order and Status.
- Click Save.
Orders (/admin/orders)
The Orders page shows all customer purchases made through the shop. Admins can filter orders by status and manually create orders for in-person or phone sales.
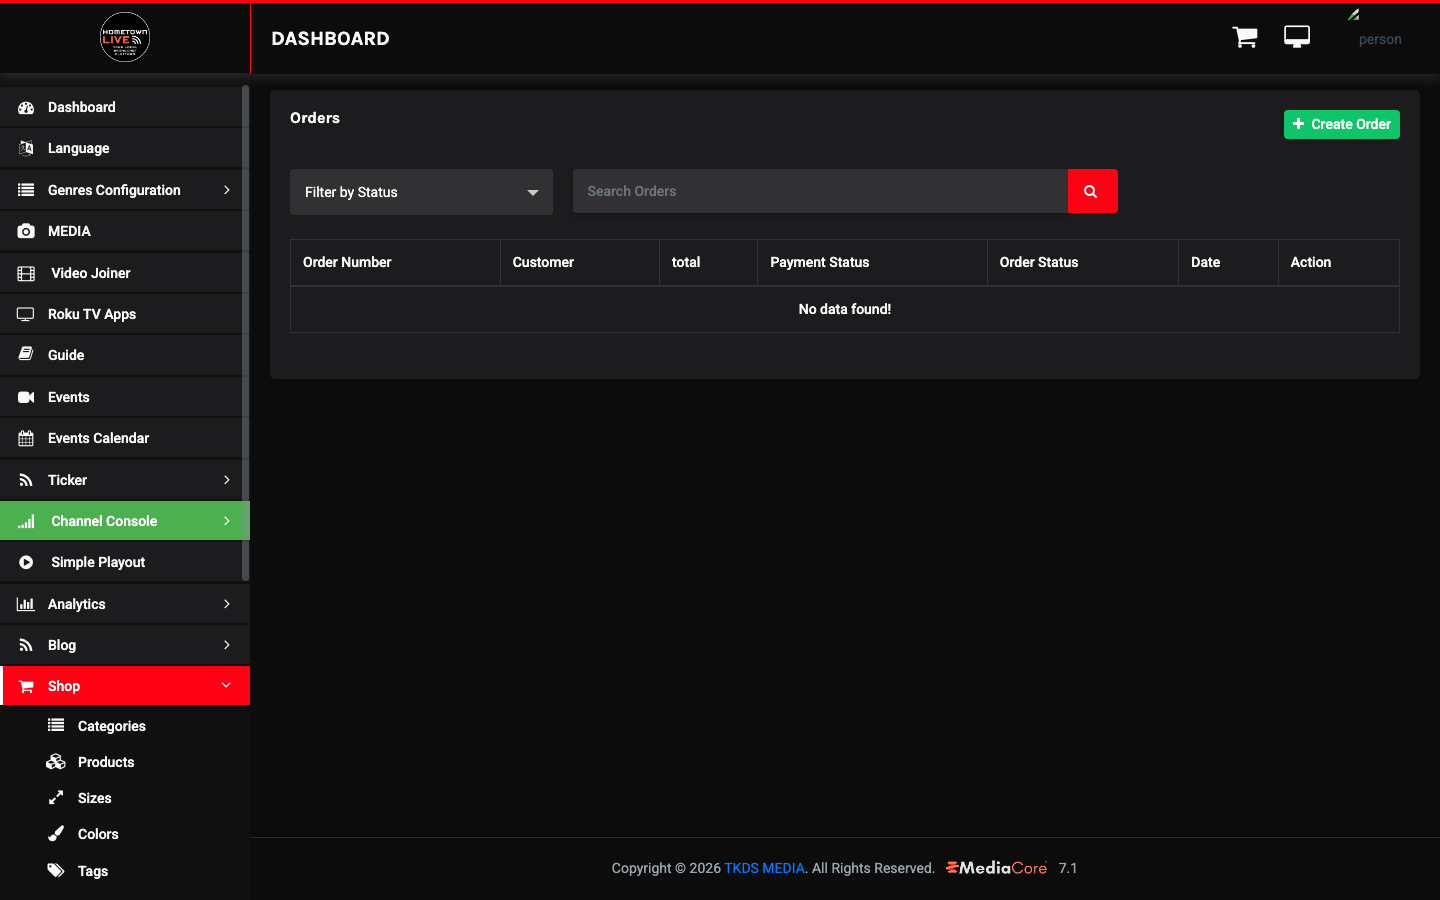
| Column | Description |
|---|---|
| Order Number | Unique identifier for the order. |
| Customer | Name and contact information for the buyer. |
| Total | The total value of the order. |
| Payment Status | Whether payment has been received. |
| Order Status | Pending / Processing / Completed / Cancelled. |
| Date | Date the order was placed. |
| Action | View or update the order. |
Filtering Orders by Status
- Use the status filter tabs above the order table: Pending, Processing, Completed, or Cancelled.
- Click a tab to view only orders in that status.
- Click All to return to the full order list.
Creating a Manual Order
- Click Create Order.
- Select or enter the customer information.
- Add products to the order.
- Set the payment and fulfillment status.
- Click Save.
Note: Manual orders are useful for in-person sales at games or events where a buyer pays with cash or a card reader outside the platform.
Processing an Order
- Click Action → View on the order you want to update.
- Review the line items, shipping information, and payment status.
- Update the Order Status (e.g., change from Pending to Processing when fulfillment begins).
- Click Save.
Tip: Update order status promptly. Buyers may contact your school if they do not receive a status update after purchasing.
Still need help?
Can't find what you're looking for? Our support team is here to help.
Contact Support →